5. Select your texture layer(s) and copy it (command-C on a Mac, ctrl-C on a PC), double click on the pre-comp "text" and and hit command-V(or ctrl-V). In the pre-comp, put the texture(s) under the the text layer.
6. You do not need to do this step if you used only one texture. Still in the text pre-comp, select both textures (click on and then shift click on the other) go Layer>pre-comp. use the same settings as before, but call it "textures."
 |
7. Click on your text layer, then go Layer>Create Masks From Text. You will see a new layer is in your pre-comp, click on it and hit "M" to bring up the masks. you can now delete your original text layer.
 |
8. Click on the Z (or the first letter) and then shift click on the N (or the last letter), hit command-C, (or Ctrl-C) click on you textures pre-comp, and hit command-V (or Ctrl-V, like you don't know this by now :P) you should have something like the photo above. delete your mask layer (the one on top) leaving you only with the "texture" layer. |
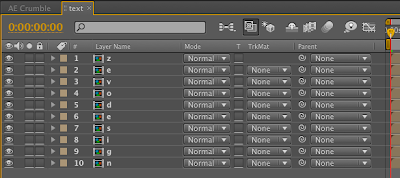 |
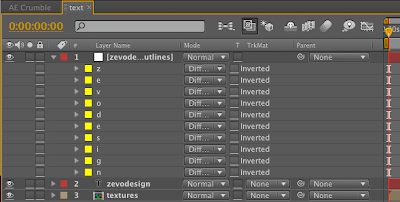
9. Copy the texture layer as many times as letters in you text (in my case, ZEVODESIGN has 10 letters, so 10 copies it was). Next, re-name the layers (click on a layer and hit return) so that the name is the same as the text, for me, the first layer was called 'Z' the second 'E' the third 'V' and so on. |
|
|
 |
10. Click the small triangle on a layer (start with the top one, which for me was Z) and then click the triangle next to the word 'Masks', you will see there is a mask for each letter. In the layer named Z (or the first letter in your word) delete all the masks except the Z. Do the same with the next letter (E, for me) but delete all but the E mask. Continue this pattern until you are at the last letter (mine is N). Now, if you make the layer called G invisible (click the tiny eye on that layer), the G will disappear. (Or if you clicked the I, the I will disappear, and so on.) |
|
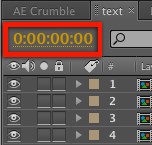 |
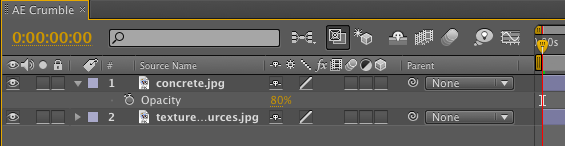
12. Scrub to the beginning of the animation, and make sure that the numbers in the corner of the time-line look like 0:00:00:00, not 00000, or 000+00. to change this, command click on them (I am not sure, but it it probably Ctrl on a PC) |
 |
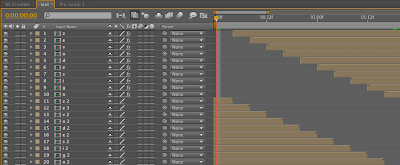
13. We need to sequence the layers by like 4 frames, (if at 24 frames per second). To do this, zoom in with the little bar on the bottom (see the red arrow? good. see the thing it is pointing to? thats what I'm talking about) push it to the right, then move the layers. If you zoomed in enough, you should see 04f 08f 12f etc in the timeline. just aline the top layer (or the first letter in your text) to 04f, the next to 08f and so on.
 |
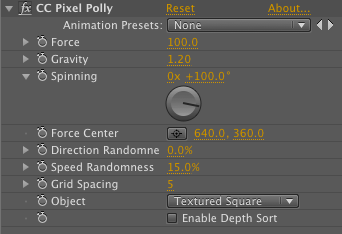
14. Now the setup is done, here comes the fun part of the tutorial. Select your top layer, or the first letter in your word, (as you know, mine is a Z) and go Effect> Simulate>CC Pixel Polly. Use the setting shown above. Select your effect (click on where it says CC Pixel Polly in the corner of the effects window) and copy it (Ctrl or command-C) then paste it to the next layer in your word, and the next, until it is on all of the layers.
|
|
 |
15. Duplicate your layers, (if you don't remember how to do this, please get your head checked :P) put them below the originals, but make sure they are still in order, (first letter on top, last on bottom). select all the the duplicates, (click on the top one, then shift click on the bottom one) and drag them until the end of the duplicates aligns With the beginning of originals. delete the Pixel Polly effect on the duplicated layers. Now we have the basic look done, its just tweaking. This should be fun!
 |
16. Once again, we need to duplicate the layers. Make sure the layers you duplicate are the originals. Put your new duplicates on top, and set the pixel polly in all the layers to the settings above.
 |
17. Back in the main comp, not the pre-comp, click on the only text layer (not the pre comp called text) and go Layer>Layer Styles>Bevel And Emboss. Use the settings above. |
 |
|
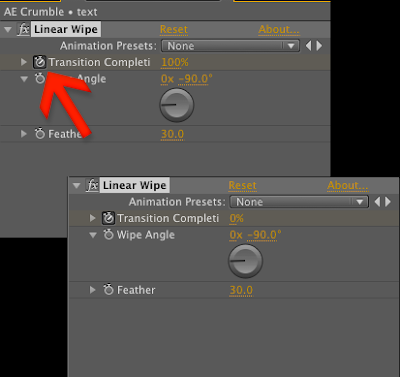
18. With the 'text' pre-comp selected, click Effects>Transition>Linear Wipe. make the Feather be 30.0 and the Angle -90. Scrub to the point in the time line when the first letter is just about to starting blowing apart, (for me, that was the very first frame). Set the Transition Completion to 100%, scrub to when the last letter is falling down, and set Transition Completion to 0%. You may have to fiddle with the key-frame position, but the goal is to not see anything other then the letter that is exploding, and a bit of the one after that. Copy the Linear Wipe to the layer below it, and just change the Feather to 80.0. You may need to move the key frames some more, but this is the fun part :) |
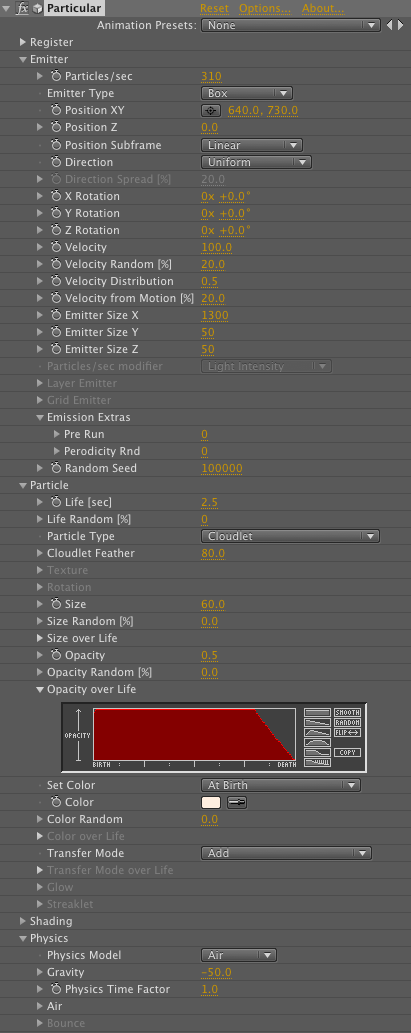 |
19. Make a new solid (Layer>New>Solid) color does not matter, but be sure to click the 'Make Comp Size' button. Make sure your new solid is on top of all the other layers. Next we need to add some particles. I think you can do this in any particle system, (if you know what your doing) but I used Particular. If you are using Particular also, then enter the settings above. If not, just try to make a rising dust look in your particle system of choice. Copy the Linear Wipe (ether one) to the particle layer, set feather to 100.0 and move the key-frames so that the dust starts rising when the pieces of plaster (or what ever is falling) hit the ground, or the bottom of the frame. Click on a layer and hit 'U' to bring up all of the key-frames in that layer.
 |
| 20. we need to make the dust that is rising up stop, slowly. To do that, click on the particle layer, hit T, scrub to when you want the dust to start stoping. Click on the little stopwatch, and make the value be 100%. Scrub to when you want the dust to have stopped, and change the value to 0%. |
|
 |
21. Make a new text layer. Have the size and letters be the same as the letters that are popping out, (so I wrote ZEVODESIGN) also have it in the same position, but have the color be white. With this new layer selected, go Effect>Blur and Sharpen>Fast Blur. set blurriness to 20.0. (Make sure this layer is on top.)
 |
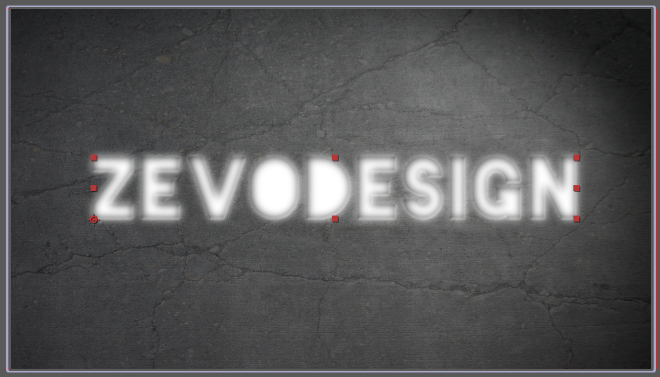
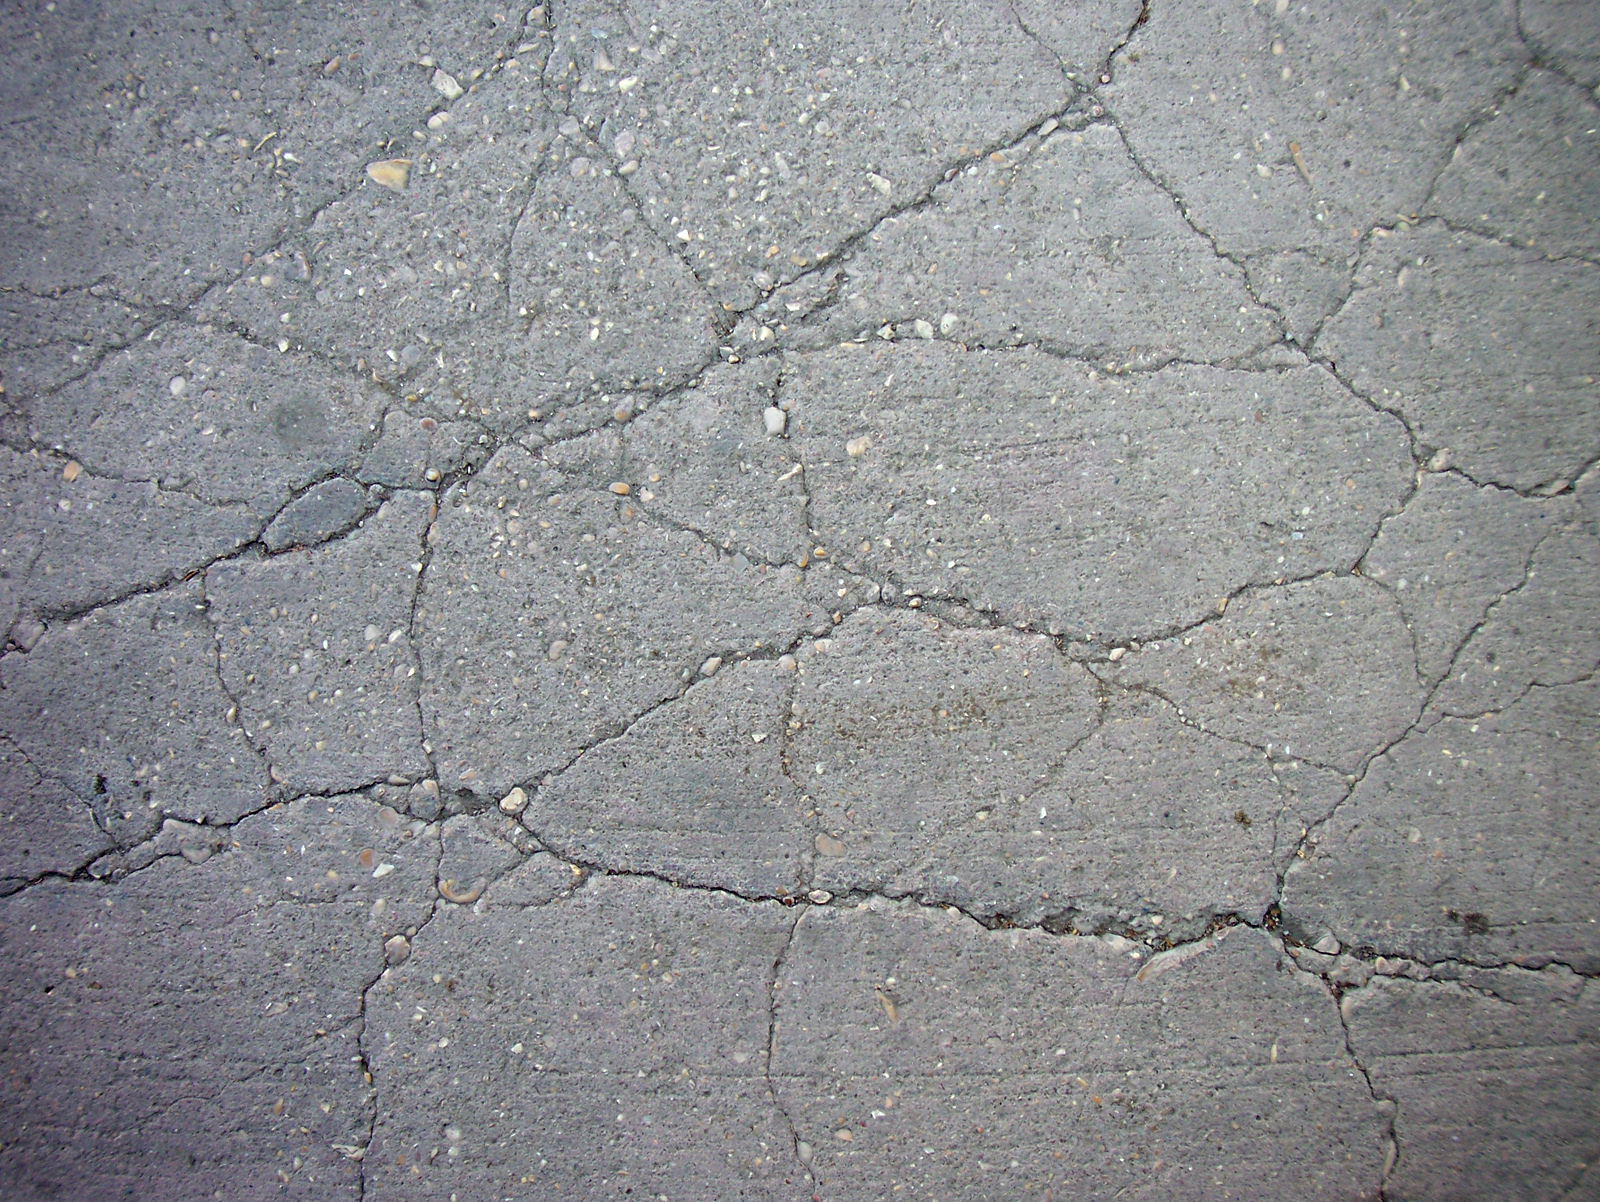
22. Now we need a stock. (I used this) drag it on to your comp, in the middle, put it on top of the other layers, and go Effect>Stylize>Motion Tile. Set the Output Width to 200 (you just want the texture to cover the text). Click on the layer below this (it should be the one we made last step) and change the TrkMat to Luma Matt. (the TrkMat menu is right next to the blending mode menu). If you don't see the TrkMat menu or the blending mode menu, just click the Toggle Switches / Modes button at the bottom of the layer panel. Done? You should see somthing like what is shown above. Lastly, change the opacity of the texture layer to 30%
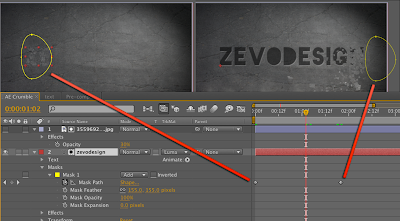 |
23. Scrub to the beginning. Click in the layer with the "Luma Matt" Trk Mat and create a new mask, about the shape and size of the one above. With the layer still selected, hit M then Shift-F. Set the Feather to about 150.0, and click the Mask Path stopwatch. Scrub to when the last bits of plaster are falling out, and move the mask with the Selection Tool (short cut V). You will have to move the key-frames a bit, to get it to look like the cracks are coming a bit before the falling out plaster, but the good news is that we're almost done!
 |
24. Add an adjustment layer (Layer>New>Adjustment Layer) and add a curves effect (Effect>Color Correction>Curves) use the Grayscale 4 Animation Preset.
That is as far as I will go in this tutorial, the rest is just fiddling around with camera shake, more color correction (perhaps some Magic Bullet Mojo?) and maybe a bit of lens blur (with depth maps... could be cool). hope you enjoyed this tutorial, please check out my youtube videos.
|
|
|
|
|
|
|
|
|
|
|
|


